Test-driven development(TDD) in the Spring framework.
TDD helps me speed up my software release cycles, and ensure that I end up with a high-quality product. Spring makes Java enterprise development much easy. Spring Boot, which we will use in this blog, is a project that does this task with excellence.
Follows are the steps to configure your spring boot framework with the Junit and Maven.
Step-1)Set up Spring boot with J-Unit testing Approach
After Set your maven dependencies , for spring-boot add following dependency for testing Approach.
<dependency>
<groupId>junit</groupId>
<artifactId>junit</artifactId>
<version>4.4</version>
<scope>test</scope>
</dependency>
<dependency>
<groupId>org.springframework.restdocs</groupId>
<artifactId>spring-restdocs-mockmvc</artifactId>
<scope>test</scope>
</dependency>
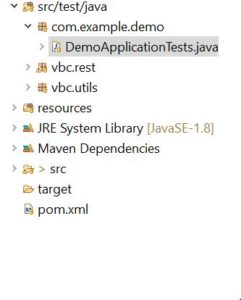
Step-2)Create test Package and in that ,create DemoApplicationTests Class.
Step-3)Inject controller using @InjectMocks, Inject repository using @Mock Annotations.
Let us take some J-Unit Annotations used in java class :
@Before:@Before annotation are executed before each test.
@After:It executes after each test.
@BeforeClass: It executes common operation before each test,So it executes only once before running all tests.
@AfterClass: It executes common operation after each test, So it executes only once after running all tests.
@Test:The Test annotation tells JUnit that the public void method to which it is attached can be run as a test case.
In JUnit 5, the tags @BeforeEach and @BeforeAll are the equivalents of @Before and @BeforeClass in JUnit 4.
Configure Java File and Select Run as Junit and Test the file.
Congratulations!!!you are done with your TDD approach.


