Tag Archives: web

Things everyone should know about responsive images and srcset

The aim of responsive images is to deliver the same image in mobile and desktop view without disturbing the viewport size that is the image should look alike in every device .

Therefore this problem of responsive images can be solved by using srcset attribute in image tag or using media queries.

Both are suitable to deal with this situation but prefer to use srcset instead of media queries because media queries will take time to write but srcset does the same thing in small time and space .
The information below will explain all about srcset .

srcset
The srcset attribute is listing different resolutions of the same image from which the browser chooses the best fitting image source before loading it.
Example: srcset="ninja-1000w.jpg 1000w, ninja-500w.jpg 500w, ..."
To calculate this, the browser assumes the image fills up the full viewport width (100vw) by default, which means it uses the full width of the browser.

In short, Srcset is a new attribute which allows you to specify different kind of images for different screen-sizes/orientation/display-types.
The usage is really simple, you just provide a lot of different images separating them with a comma like this:

<img src="image.jpg" alt="image" srcset="<img> <descriptor>, ..., <img_n> <descriptor_n>">.

Here is an example:

srcset="image.jpg 160w, image2.jpg 320w, image3.jpg 2x"

Descriptors are just a way to show what kind of image is coming from the resource. There are various kinds of descriptors:

  1. density descriptor–> srcset=”image.jpg, image-2X.jpg 2x” The display density values—the 1x, 2x, etc. are referred to as display density descriptors. If a display density descriptor isn’t provided, it is assumed to be 1x.
  2. width descriptor –> srcset=”image-240.jpg 240w, image-640.jpg 640w”.
    When using the w-descriptor we have to specify the default explicitly by adding a second srcset image option, with its own w-descriptor, and separating them with a comma.
  3. size descriptor–> It only makes sense if you use width descriptor.
    srcset=”image-160.jpg 160w, image-320.jpg 320w, image-640.jpg 640w, image-1280.jpg 1280w” sizes=”(max-width: 480px) 100vw, (max-width: 900px) 33vw, 254px”>.
    The instructions for the browser would look like this: (max-width: 480px) 100vw — if the viewport is 480 pixels wide or smaller, the image will be 100% of the viewport width.So it is like using media queries in html which looks a lot easier as compared to media queries written in css .

Pros–>
1.much easier than media query
2.saves time

Cons–>
1.Browser should be updated to see the effect
2.Not all browsers support this.
At present, Edge, Safari, and iOS Safari only support a subset of the srcset specification. Firefox, Chrome, Opera, Android Browser, and the forthcoming versions of Safari and iOS Safari fully support it.

Demo can be seen on my github link
pershantgoel.github.io/imgsrcset

Test Driven Development with SpringBoot+Junit


Test-driven development(TDD) in the Spring framework.

TDD  helps me speed up my software release cycles, and ensure that I end up with a high-quality product. Spring makes Java enterprise development much easy.  Spring Boot, which we will use in this blog, is a project that does this task with excellence.

Follows are the steps to configure your spring boot framework with the Junit and Maven.

Step-1)Set up Spring boot with J-Unit testing Approach

After Set your maven dependencies , for spring-boot add following dependency for testing Approach.

<dependency>
<groupId>junit</groupId>
<artifactId>junit</artifactId>
<version>4.4</version>
<scope>test</scope>
</dependency>

<dependency>
<groupId>org.springframework.restdocs</groupId>
<artifactId>spring-restdocs-mockmvc</artifactId>
<scope>test</scope>
</dependency>

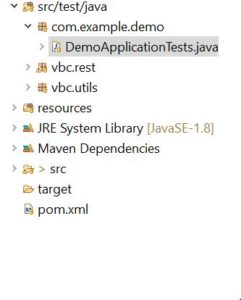
Step-2)Create test Package and in that ,create DemoApplicationTests Class.

Step-3)Inject controller using @InjectMocks, Inject repository using @Mock Annotations.

Let us take some J-Unit Annotations used in java class :

@Before:@Before annotation are executed before each test.

@After:It executes after each test.

@BeforeClass: It executes common operation before each test,So it executes  only once before running all tests.

@AfterClass: It executes common operation after each test, So it executes only once after running all tests.

@Test:The Test annotation tells JUnit that the public void method to which it is attached can be run as a test case.

In JUnit 5, the tags @BeforeEach and @BeforeAll are the equivalents of @Before and @BeforeClass in JUnit 4.

Configure Java File and Select Run as Junit and Test the file.


Congratulations!!!you are done with your TDD approach.

Eclipse not auto-configuring/auto-importing a Git mavenized project

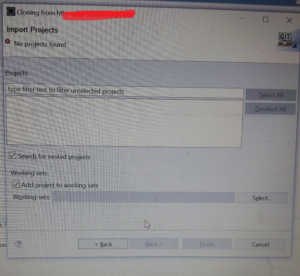
I was trying to setup a maven project in eclipse via GIT. I had hoped, it will auto import the project into eclipse, but for some reason that did not happen.


This is what was done as a workaround:

Step:1 Checkout your repository in your system

File->import->Git->Project from Git->Clone URI->Enter Git Repository Details

Select Destination where you wanted to store your Git Repository

Step:2 Import your Project into Eclipse

File->import->maven->install or deploy an artifact to a Maven Repository

Once these steps are done, The project is browsable in eclipse!

Some Helpful Git Commands for the commandline:

git init — Initialize your directory with git.

git add FILE and git checkout — FILE To stage/unstage a file

git commit— To save your changes. This commit will be local

git stash and git stash pop — Stashes are back

git reset HEAD –hard Revert all your local changes

git log— Access all the history in the repository

git rebase –You can squash all the commits! (one should be carefull with this one)

git branch –You can create local branches,But keep the history linear

Hope this workaround and the commands are useful to a new user.

What Elon Musk can learn from Java App/Cloud Deployments!

I had an unproductive day yesterday!

I did nothing, but slept through most of the day. And then late night this next challenge of deploying the hush-hush java app over the cloud started to bother me.(afterall it was not a totally unproductive day, thinking wise!)

And then, flash back to a few days, where comparisons were made, what I am doing (javascript ehew!) and what one of the current top living inspiration in the current world Elon Musk is doing, and then I went into sad slumber!

Then yesterday happened, and then it clicked:: we Java devs(web ones, not hard core jdk ones) are orchestrating everything in lifecycle of what Elon Musk is trying to do!

Here is the analogy(it can be extended wonderfully!):

  1. The WAR(Web ARchieve)(sorry, I am old fashioned) is like the unmanned space ship.
  2. The dev JVM is like simulated Mars environment.
  3. The cloud is the SPACE where the bits travel to-and-fro in form of data/packets.
  4. The machine IP Address is like the lat/long of where you want to deploy.

So my current app is in its final integraton phase(hush-hush…) and I am trying to accomplish Slide Driven Development.(nice term!).

Slice Driven Development :: A development approach where a feature/flow is shipped to staging environment as soon as it becomes usable.

Currently I(with @explorer) are trying to integrate all features/flow of the hush-hush app, While I am totally unsure/unaware how it will behave when deployed on staging/production environment. Therefore, I had come up with this approach :: The momemt a feature becomes bug-discoverable, it ought be shipped so that:

  1. Move to the next flow..
  2. Bugs can be quashed..
  3. (most imp)Our path of going from dev–>staging–>production for any feature should be seamless and smooth like  skating on butter!

And then, a Eureka moment happened!! And this blog post came about!

Your Takeaway: If you are on a team working with Elon Musk(or anyone trying to transport stuff from place X to place Y, in an unsure environment), you can leverage from the experience of thousand if not millions of deployments of web java developers trying to deploy WAR file formats from local dev JVM to production JVM.

We know the nuances of this lifecycle!

It might save you some time! 🙂

When the internet was crippled to a halt! ~ The dDos attack – A Post Mortem

The Problem

Couple of days back, 21-October-2016 everyone connected on the web experienced sluggishness in connecting to the normal sites and saw obstruction in their regular works.

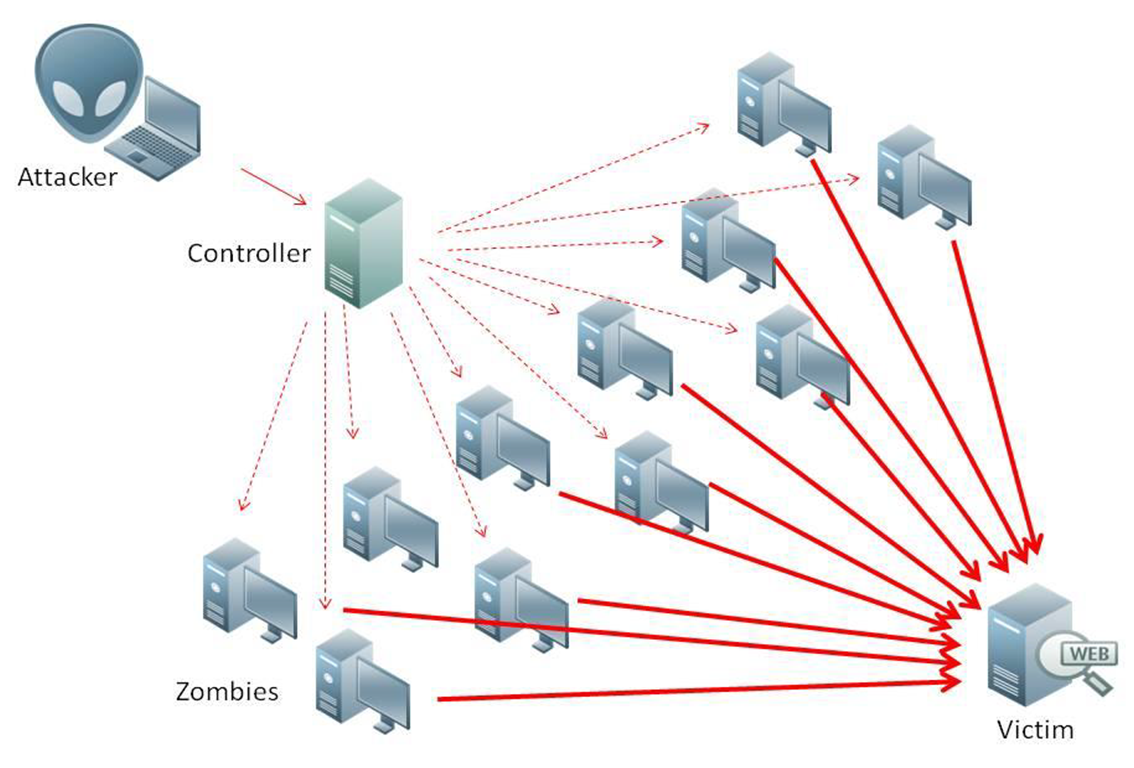
The scenario can be visually described as follows:

DDOS Attack Explained

Incase you might be wondering why this attack happened now, the internet is way mature, why can’t it protect itself from such attacks?

Well, then do read on…

The Players

From an ideal perspective the players in the attack are listed:

  1. Users of the web (us) (attackers and victims)
  2. ISP’s (medium through which attack was carried out)
  3. Device Manufacturers (Things, which got compromised — zombies)
  4. Regulatory Organizations (They are mostly sleeping or doing other important silly stuff, lets leave them out of this discussion)

The Premise

Let us look at those questions asked earlier and more:

What is dDos?

It stands for distributed Denial of Service. Consider your regular pesky thing that you have to do and can’t live without?(siblings,kids,neighbours.. anyhuman thing). They come nagging to you, you can handle it but maybe 10 requests in a day a max! The 11th request from that pesky thing will get a denial of service response!(simply a No!)

Now,Imagine yourself at a play house. And you are already having a minor headache(it was Friday, everyone was in the mood to relax). Multiply your single pesky thing with say 10, you are bombarded with pesky request from everywhere, what will happen to you? You might handle say 20 requests at that moment, looking at the situation, but a time will come soon where you will get exhausted and simply stop responding to important requests of like : open the door, and you are standing still!

You just got dDos’ed 🙂

Can you explain it in layman’s terms?

Here is the wikipedia entry.

I still did not get it..

See this:

Why this attack happened now?

It was waiting to happen, its like too many cooks, spoil the broth kinda scenario. Lot of unpatched/sloppy devices connected to the internet working for you and they all had a common zombie entry point, that simply got activated!

The internet is way mature, why can’t it protect itself from such attacks?

I am sure there are some orgn that were actually fighting this menace! Imagine a hospital unable to get reports of a patient in critical condition!So I am pretty sure what got reported and what actually got fixed and treated is somewhat different. So the internet is not at all mature, we are still not ready to have our life depend on it, our livelihood might depend on it but not life!So some orgn might be involved (even now) preventing many such attacks to keep the internet working, and some sleeping regulations might have also protected and saved us from a much more severe attack!

The rules are pretty simple, everyone is united on this matter and no one likes a dDos attack to happen! It actually interrupts normal/perceived flow of life on a day-to-day basis.

So basically its the attackers who (misued?) a compromised device and affected the network. Its pretty clear, there is something that needs to be fixed/controlled in the wild. And its not impossible..

Onto the solution then, shall we proceed?

The Solution

Two parts solution can be proposed:

  1. Regulation. In an ideal world, regulation is already in place and device manufacturers are supposed to follow them and hence they are able to sell their products. So something stronger needs to be put in place for regulation. Say if a device is an IoT kinda device, then as per regulation it should be allowed to use 5% of the bandwidth. If its a phone or a computer, then it will not have such a restriction, or maybe it can have!
  2. ISP Level Quota Software. ISP’s would want to pitch in this idea, where a custom configuration software would be installed at per user site and there based on the MAC address the bandwidth quotas can be defined. Say you got a new IoT device for your home, you will get to configure and set a max bandwidth that device is allowed to consume on your home network.

Thoughts?

Securing your AWS instance!

A daunting task of getting the things secured in the app! Here’s a plethora of links that can help anyone lost/looking to get it done!

  • Cant trust https? Well, roll out your own, AT YOUR OWN RISK!(A must for even https GET calls)
    http://dacrazycoder.blogspot.in/2013/09/encrypt-url-parameters-using-aes-in.html
  • openssl | Getting started with the certificate
    https://www.digitalocean.com/community/tutorials/how-to-install-an-ssl-certificate-from-a-commercial-certificate-authority
  • Look here if nothing works!
    http://www.thefarmdigital.com/blog/technology/how-do-i-setup-ssl-on-aws-elactic-load-balancerelb/
  • FF issue(double check in the browser too!)?
    https://sslanalyzer.comodoca.com/
  • AWS docs(perfect example of information overload)
    http://docs.aws.amazon.com/elasticbeanstalk/latest/dg/configuring-https-elb.html
    http://docs.aws.amazon.com/elasticbeanstalk/latest/dg/using-features.managing.elb.html
    http://serverfault.com/questions/356598/why-cant-i-reach-my-amazon-ec2-instance-via-its-elastic-ip-address
    http://serverfault.com/questions/238976/cname-to-aws-public-dns
    http://pushentertainment.com/rds-connections-by-instance-type/(DB)
  • Testing what you have
    http://mxtoolbox.com/productinfo/domainhealth
    https://www.sslshopper.com/ssl-checker.html
    https://sslanalyzer.comodoca.com/
  • Small things(Hacks!)
    http://stackoverflow.com/questions/22290821/using-a-wildcard-ssl-with-a-cname-pointing-to-ec2-instance
    http://passwordsgenerator.net/

Dont forget, if you have a front controller for your aws, you need to apply the certificates there also!

And finally once all is set up turn off your http listeners for port 80! 🙂

And here’s a link to end the atrocities of the monopoly of the so called CA’s : https://letsencrypt.org/ 😀

DejaVu : Web Services!

For the un-initiated, I am working on my lesser liked topics in the programming world, JS and WS!

I had recently started appreciating the WS without XML/Annotations a few weeks back, but to my surprise, the XFire implementation is no more supported in Spring 3.x hence I had to fall back on XML and Annotations.

I could come up with a working example of contract first WS development from here, and I was happy to see things working as expected, except for the inherent pain of seeing and using XML/Annotations.

This made me re-visit my understanding of whether to use java-first or wsdl-first approach for development.

I was initially a supporter of java-first simply due to my dis-liking for XML, now it seems a wsdl-first approach can keep the concentration of implementation towards the data structure of the messages that go to-and-fro.

That said, if I develop a java-first implementation, and give the 3rd party implementation team the link to the wsdl, does the 3rd party implementor stand to loose anything?

Either way’s even if they are using something other than java to consume the services, they have to wrap the response as per their conveneince, the only tradeoff that I seem to have is the structure of the wsdl message is not the fundamental change item, but the java method arguments become the items that define/control the change.

The only flexibility that I might be loosing here is the power of functional programming language, as-in imagine if a functional programmer implements a wsdl as per my current understanding, I question, does that programmers changing of the wsdl based on the arguments that come and go, affect(ease/pains) my implementation?

To conclude, do I stand to loose anything if I *still* go the java-first implementation way?

Your thoughts?

~rohit.

Debugging JSP Request/Session Variable

Of all times debugging jsp code is the most challenging of all times to me that anything else.

And for that, I came across the linked jsp and the following code snippet in the footer jsp of the application:


      <%@include file="/WEB-INF/jsp/debug_session.jsp"%>

keep the debug_session.jsp as per the path defined in the above snippet.
To check all request & response variable while developing, just update the current url as:

  
http://localhost:8080/context-path/login.jsp?debug=jsp

And you can easily check all variable without trying to search them in the request object on your IDE, while debugging!

Here is the debug_session.jsp

~rohit.

The social media thing!

Recently at work, I was given the task of implementing social engagement buttons for the likes of Google +1, Twitter, Facebook, LinkedIn.

And the successful implementaion was in two phases.

The first phase: Installing/Configuring the scripts for inclusion and second was testing them out!

Here comes the comparison of their usage:

Ease of finding share buttons.

Here LinkedIN fared last(it took me some time to reach the actual page)), while facebook came second last(it was simply not intuitive to see what changes were getting affected) and google just beat twitter for better placement of the generated script.

Basis: Easy finding + Instant display of customization + Zero extra effort.

Size of included JS

Here FB was last with 100+KB of script, while other three were quite okay, seemingly under 29KB all three combined.

Basis: Don’t know why FB is pushing so much client side javascripts?

Ease of understanding the tag’s

Here the clear winner is twitter, as they simple do a script include and use an anchor tag! It can not get simpler than this. Google came second by making it complex by adding their own custom tag. FB was ugly, while LinkedIN was pathetic, as there was not handle that I could find in their code!

Basis:I am a non-UI guy, so and anchor tag + js include sounds like I am at home!

Alignment on the UI

Twitter and Google fared quite well here, as placing them in a span/div tag, did not distort their buttons, whle FB and LinkedIN folks seems to have done a sloppy job here. Try putting a div around them and you might see their button’s vanishing at times!

Basis:I should be given complete freedom to place the button’s where I like’em.

Getting them to work!

All 4 of these scored 0 on this front. I wasted one whole day trying to figure-out the reason for these tag’s not working on localhost. Surprisingly they require a live public url for them to work fine!

Very dis-appointing!

Basis:I suppose I should be able to test on local how these buttons look for testing!

After getting them to work!

Al most all of these have a bug that if I delete the publicly promoted link/url/etc, the count does not seem to come down accordingly.Strange, but true.

No – Thank You!

For incorporating all of them I had to create a new id and register. I am glad I did it that ways, because LinkedIN was all over me pouring all their corporate tie-ups link/spam/trash all to me and making me a subscriber by default. Also reading the fine print LinkedIN seems like they are selling all infromations to 3rd party affiliates without a clear consent!

Going through FB and twitter settings was also a pain, did not go through details on +1!

Basis: No thanks for the spam!

The inclusion codes for each of these are available on these sites:

1/Google +1 2/Twitter  3/Facebook 4/LinkedIN

Well after checking out the code on a live public url, I suppose the feature would easily come out, but this was an interesting learning experience about how do folks at big public organizations code!

Twitter seems to be leading in this front by keeping it really simple!

~rohit.

Zero Fat( read: XML), Zero Cholestrol(read: Annotations) Web Services!

I have never been an advocate of XML per-say.
And I was faced with the difficulty of writing one recently overwhelmed by the amount of XML and Annotations, well I was looking forward to a hard day ahead. 

Then motivated to defeat XML in my own war, and reducing its footprint in the codebase I am working on, I put on the searching glasses and XFire came to the rescue(credits to them for integrating WS in the most cleanest manner done with Spring, that I know of!)

Now that the plot is set, here’s simple how to:

Presumption: You have two different projects one is the WS other is the consumer of the WS.

Step 1/ Write your service and its implementation in the WS project.
(eg: XXXService/XXXServiceImpl for the project YYY)

Step 2/ Configure the usual project as a spring web project.

Step 3/ Add the following snippet into the web.xml(append incase you have contextConfigLocation predefined.). This makes your project XFire aware.

  
    contextConfigLocation  
    classpath:org/codehaus/xfire/spring/xfire.xml  

Step 4/ Expose the service as Http WS through XFire Exporter:


        XXXService    

Step 4.2/ Inject the Service Impl Bean.


Step 4.3/ Configure the Url for accessing the Service.


Step 5/ Deploy the WS project an tomcat/jboss.


|| End of Server Side Configuration||

Step 6/ Test using the soap url:: http://localhost:8080/YYY/XXXws?wsdl

Step 7/ Configure the XFire client on the other project as follows:

    
      XXXService        
      http://localhost:8080/YYY/XXXws?wsdl    

Step 8/ Inject it in your client


Step 9/ The client should be configured as::

public class WsClient{    private XXXService xxxService;}
|| End of Client Side Configuration||

Step 10/ Done!

Things to remember::
1/The Java Interface XXXService needs to be shared with the client.
One can overcome this by creating a third common project shared for the WS Provider and WS Consumer.

2/Any changes in the WS provider, would require re-deployment of the first project.
This is the least a java developer(xml unfriendly) can absolutely live with!

3/Once these configurations are done, forget that you ever need to look into the xml’s!
Also any change addition/removal of the methods that needs to be exposed will be purely a java exercise, without requiring to smell XML.
Well you won’t be able to find any xml!!!, thanks again to the wonderful folks at XFire!

PS: All these steps are written here with the help of http://xfire.codehaus.org/Spring+Remoting and implementing this in a production environment!

Hope this helps you in reducing the amount of unnecessary XML’s in your java projects!

~rohit.